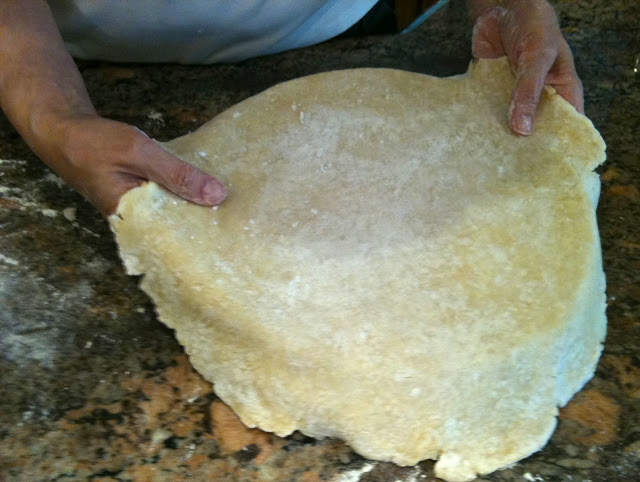
First, let's pull yesterday's dough out of the refrigerator so that it can warm up just a little (if it's too cold it'll crack instead of rolling out properly; if it's too warm it'll fall apart-- so we want to just warm it up enough to be handled). You can actually warm it a bit with your hands, being sure to rotate it and pay attention to the edges, until it's just soft enough to be malleable all over.
Carolyn usually uses a large board to roll out pie dough, but it's gone missing after a challenging kitchen remodel; so today she'll be rolling out the dough directly onto a granite countertop. We'll want to do a good job preparing this surface: sponged down, then dried with a towel, and visually inspected for dust.
We can set out today's ingredients and tools: flour, a rolling pin, a scraper, the disc of dough, and a pie (or in this case, a tart) pan.

We'll want to dust our rolling area with flour:
Now let's unwrap the dough and center it on the flour.
Now, let's begin rolling. Carolyn likes to start by using the end of the pin to sensitively and carefully press out the dough, one side at a time, so that she can be sure it's the desired shape.
She stops rolling and frequently adjusts and shapes by hand, being careful to keep the edges solid.
Sometimes it may be necessary to add flour, either on top or below. I asked if she worries about adding too much flour (something that's a real issue for me with bread, for instance), and she said that it's not a problem: it won't really bond with the dough enough to worry about.
All of these steps were quick and self-assured, but she took frequent breaks from rolling to check the edges with her hands.
Continue to roll out the dough until it's well over the size you need.
Now, today's dough is destined for a tart pan with a removable bottom, so getting the dough into the pan is easy: she slid the removable bottom disc under the dough, then lifted it gently and settled it into the pan edges.
Carolyn's technique for normal pans is to gently fold the circle of dough in half, then carefully lift it and center it over the pie pan. Once it's in the pan, it's time to gently ease it down around the inside edges.
Carefully press the inside edges down until the dough is smooth and even on all sides, then press against the sides so that the dough takes the shape of the pan.
All edges will overhang, but some will overhang more than others: these can be torn off...
...and used as patches for weaker spots on the edges.
Once all the edges are solid, Carolyn trimmed them to the tart pan with the scraper.
The glorious-looking end result, smooth, perfect and ready to be refrigerated!
But wait... there's more dough left-over! Carolyn rolls this out:
Then dusts it with cinnamon and sugar:
Then rolls up the cinnamon and sugar like a Mafioso rolling a body into a rug:
A few quick presses of the fingers seals the dough around what's now a tube of deliciousness:
Then the scraper comes along and chops this cylinder into delicious-looking little cinnamon cookies!
Finally, the tart dough and the cookies all go in the refrigerator to cool down.
Thanks for reading. Tomorrow I'll post photos of the tart once it comes out of the oven!


No comments:
Post a Comment