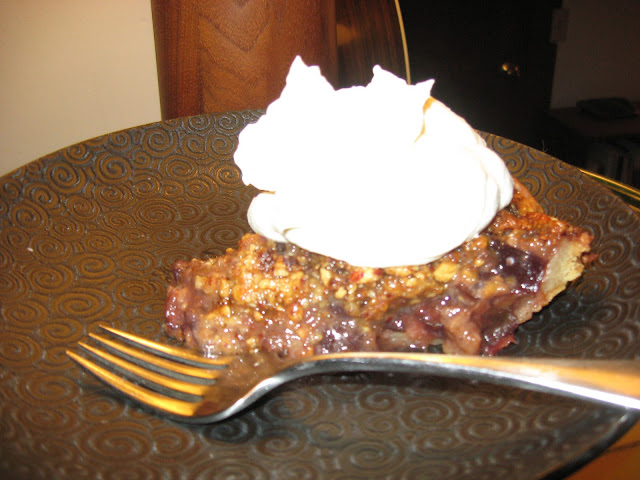
This is an interesting one: half-sweet, half-savory. I made this with frozen italian prune plums from the tree in our backyard's late-summer bounty. By the time they were thawed they were more prune than plum, with a deep, rich, wine-like flavor. My toasted-hazelnut topping wound up being a bit of a letdown (though I want to make sure anyone reading this is aware that toasted salted hazelnuts on their own are the most delicious snack ever in the history of the world. They just didn't shine in this context.) This pie wound up being a good dessert... but an even better breakfast. I'm going to try this recipe again soon, with blue cheese added, and make it explicitly savory.
First up, I'm pretty happy with the Four & Twenty Blackbirds dough recipe. But I've become convinced that I'm not cutting the butter in properly- every recipe I use, including this one, winds up boiling out the butter during prebaking, so that the result is crispy rather than flaky, and occasionally even hard and brittle. My lovely wife bought me a pastry blender, so my next pie may get different results. I will report on that as it happens.
Here's my shaped crust. Note the large chunks of butter and the uneven distribution.
The filling recipe, heavily adapted from the original source (Ken Haedrich's Pie, a recipe called "Italian Prune Plum Pie"):
4 cups halved and pitted prune plums (I used about 5 or more cups, some halved and some chopped, and since they were frozen, then thawed and drained, it wound up being just barely enough)
1/3 cup plus 2 Tbsp sugar (I used the equivalent amount of honey)
1 Tbsp fresh lemon juice (I juiced half a large lemon, which was probably a bit more than this).
1 1/2 Tbsp cornstarch
1. Prepare the pie crust (I actually prebaked mine for 15 minutes, which may or may not have been the best way to approach this pie). Let the crust cool a bit, and/or refrigerate 15 minutes.2. Combine plums, sweetener, and lemon juice in a large bowl and set aside 5 min to juice. Sift the cornstarch carefully over the top while stirring. 3. Pour the filling into the cooled crust. Bake for 30 minutes at 400 degrees with a foil-lined baking sheet on the rack underneath.
Here's my filling, being heavily dosed with cinnamon. Even though it's not in the recipe. Because I love cinnamon.
The filled pie!
Side view.
Now, for the hazelnut topping recipe, also, heavily adapted from the original source (Ken Haedrich's Pie, any of several recipes which include "Hazelnut Crumb Topping"). As noted above, the first steps of this should be done before the above (don't do what I did and make a drastic change of plans midway through!):
3/4 cup hazelnuts
1/2 cup sugar (I used honey, which I think was a bad idea in this context- instead of a crumb topping it became a mush)
1/4 tsp salt
6 Tbsp (3/4 stick) cold unsalted butter, cut into 1/4" pieces
1 Tbsp milk or light cream
1. Start by toasting the hazelnuts: spread them out on a baking sheet and bake at 350 degrees 10-12 minutes, then roll into a clean tea towel, let them sit a minute, then rub them vigorously in the towel to remove (some of) the skins. (Make lots of extras of these, they're a delicious snack with oodles of salt, some sweetener and black pepper or herbs).
2. Combine the nuts, sweetener and salt in a food processor and pulse until chopped. Scatter the butter over the top and then pulse again until the mixture resembles fine crumbs. Sprinkle milk over the top and pulse again briefly.
3. Transfer to a medium bowl and rub between your fingers to make damp gravelly crumbs. Refrigerate until ready.
4. Reduce oven temperature to 375 degrees, take out the pie, and spread the crumbs on top. Bake another 30-40 minutes.
Hazelnuts, toasted and in skin-removal mode.
Hazelnuts being chopped with butter in the food processor.
The topped, baked, result.
This was delicious, but would have been even better with dry sweetener in the crumb topping. Next time around this is going to be extremely good.


No comments:
Post a Comment